
Reading Time: 7 minutes
This interesting gadget became really quickly one of my favorite accessories. I carry it now always with me no matter where I go. The Ultimate Lens Hood makes it easy to create better pictures in a very easy and convenient way. But what does the Ultimate Lens Hood really do?
The Ultimate Lens Hood (ULH), is just a brand name. There are other brands out there but this one was the one that got funded through Kickstarter.
It replaces your regular lens hood, which you always should use, in certain situations. The ULH helps you to remove reflections and glare when shooting through glass, like windows. With the ULH, shooting through a window becomes as easy as 1-2-3.
- Attach it
- Rest against the Window
- Take reflection-free photos
The ULH is a flexible silicone cone. Attach it to the front of your lens and then push it against the window. It will block all the glare and reflection from unwanted lights. The advantage of the Ultimate Lens Hood against other systems like a Lenskirt is the flexibility of how you can use it.
You don’t need to attach anything to the glass, the silicone lens hood is attached to your lens and therefore makes it easy to move from one spot to another. Also, because of its flexible construction, you can use it on all kinds of glass which is not perfectly flat, and you still can stop the disruptive ambient light from creating unwanted reflections.
Sometimes you are at places like observation decks and want to create beautiful photos at night. But they won’t turn the lights off in the observation deck for you to take photos. Previously I brought a black sweatshirt with me to wrap it around the lens, once set up near the window. This was always a pain and it never sat right. As I was by myself, I had no help either.
Look at these photos from the Columbia Center Tower, especially the ones taken at night. Can you see the reflection in the window? I can and it’s very noticeable for me. I tried to use my sweatshirt to get rid of them. But holding the sweatshirt, while at the same time operating the camera, was no easy task. Of course, the sweatshirt helped a lot, otherwise, they would look even worse, but back then I didn’t have the Ultimate Lens Hood. It wasn’t even on Kickstarter back then.
What’s in the Box?
Inside the inconspicuous box with the letters ULH on the front, you find a microfiber cloth to clean your lens as well as remove smudges from windows when using the Ultimate Lens Hood. A postcard-sized instruction card gives some quick info on how to use the silicone lens hood. Last but not least we have the ULH silicone cone folded flat for easy transport and storage. This is the biggest ULH they make, and it fits lens bodies with a size of 60 mm and bigger.

How to mount the Ultimate Lens Hood
The best and easiest way to mount it is by putting your full hand through the opening in the middle and stretching it to the size needed. From there push it onto your lens. Be careful by pulling it open, especially if you pull unevenly, you could damage the silicone hood.
I had no issues getting it over my Canon EF 24-70mm f/2.8L II USM which has a filter size of 82 mm, meaning the body itself is a little bit bigger than that. I also was able to get it over the original rigid lens hood of my Canon 70-200mm f/2.8 which allowed me to remove it quickly and easily from the lens.
The company makes other sizes, but for DSLR lenses you should go with the bigger one, which is just called Ultimate Lens Hood. The other sizes are ULHgo, ULHmini, and ULHmobile (for smartphones).
Using the Ultimate Lens Hood
Once you mount the ULH onto your lens, pull it on the outer edge, so you get a big cone. Line up at the preferred spot on the window and push your camera in as close as you can. This helps the silicone cone to stay on the window and give you a good seal all the way around.
With one hand keep pushing the silicone hood against the window, while you use your other hand to operate the camera, including aiming at your subject and pushing the trigger. The only problem you will find is if you have to zoom.
I recommend you get your zoom level dialed in first, even without the silicone pushed flat against the glass. Just make sure you get your zoom level set to the right amount. Now start over, fold out the cone, and push it against the window to have it sealed all the way around. Be careful, don’t go too far, as you might push your zoom to a different level if you have an external zooming lens.
Depending on the angle of your camera to the window/glass and your focal length, you might see the ULH overlapping your image on the corners. You can now decrease your focal length to get a “wider” picture and crop it in post-production or move and modify the shape of the ULH, so it is not in the picture anymore. You can do this by putting little “kinks” in the folding lines of the silicone. Both methods have advantages and limits. Just experiment a little bit.
Additional Tricks
Tripod Trick
If you can use a tripod, set it up so the silicone cone reaches all the way to the glass. Now you can use the built-in timer for the camera to take a delayed picture while you have both hands free to hold the silicone cone flush against the window on both sides. This is helpful for convex glasses like some aquariums have. But make sure you are allowed to use a tripod.
Suction Trick
If the Ultimate Lens Hood sits nicely and is sealed on your lens. You can use a little trick to make it stick better. Pull out the cone all the way and push it against the glass, keep going so the cone folds itself back together. While you do that hold with one hand the ULH while you move the camera with the other hand. Once you are all the way against the glass or almost touching it. Pull the camera back a little bit and it creates a small vacuum inside and the silicone lens hood will stay attached all the way around. I still keep one hand on it as small movements can be enough to break the air-tight seal and it will lose its suction. This technique is a bit of a hit-and-miss and requires some practice. Be careful not to move the camera a lot.
Alienated Usage Scenarios
The developer of the ULH brought up some additional usage scenarios. Put on the ULH backward and fold out the cone to protect your camera from the elements. This is very helpful if you are shooting near waterfalls with lots of mist.
You can also use it as a changing pad when you are outdoors and want to change your lens. Where do you put it? fold down the ULH flat as a pancake and it acts as a barrier between the underground and your equipment. The Ultimate Lens Hoos is easy to clean. You can just rinse it off in the sink and it also dries very fast.
Comparison
Below is a comparison of taking a photo at night through a glass window. I took this picture of Downtown Salt Lake City from my room at the Sheraton Salt Lake City. I didn’t care much about framing and composing the picture. Instead, I wanted to show a good comparison of what it looks like to take pictures through a glass window with and without the Ultimate Lens Hood. The room actually had a balcony to avoid taking pictures through the glass window. But this is just to show you what a difference the ULH can make. Of course, you can wrap a dark T-shirt or sweatshirt around the lens to seal off the light in the room. You can turn off all the lights in the room, which is probably the easiest solution. But that’s not always possible, for example in public observation decks or if you shoot through a window in a hotel hallway.


Where to buy?
You can order it through the official website ultimatelenshood.com and have it shipped from the UK. To make life a little bit easier, I ordered it through B&H Photo. Unfortunately, I couldn’t find it on Amazon. Be aware there are a bunch of cheap knockoffs on Amazon. These are not the original ULH. The price for the large ULH is just under $40 USD. Everything else is fake.
Note: This is NO affiliate link. I won’t earn any commission if you either go to ultimatelenshood.com or use the above link which will bring you to B&H Photo.
Conclusion
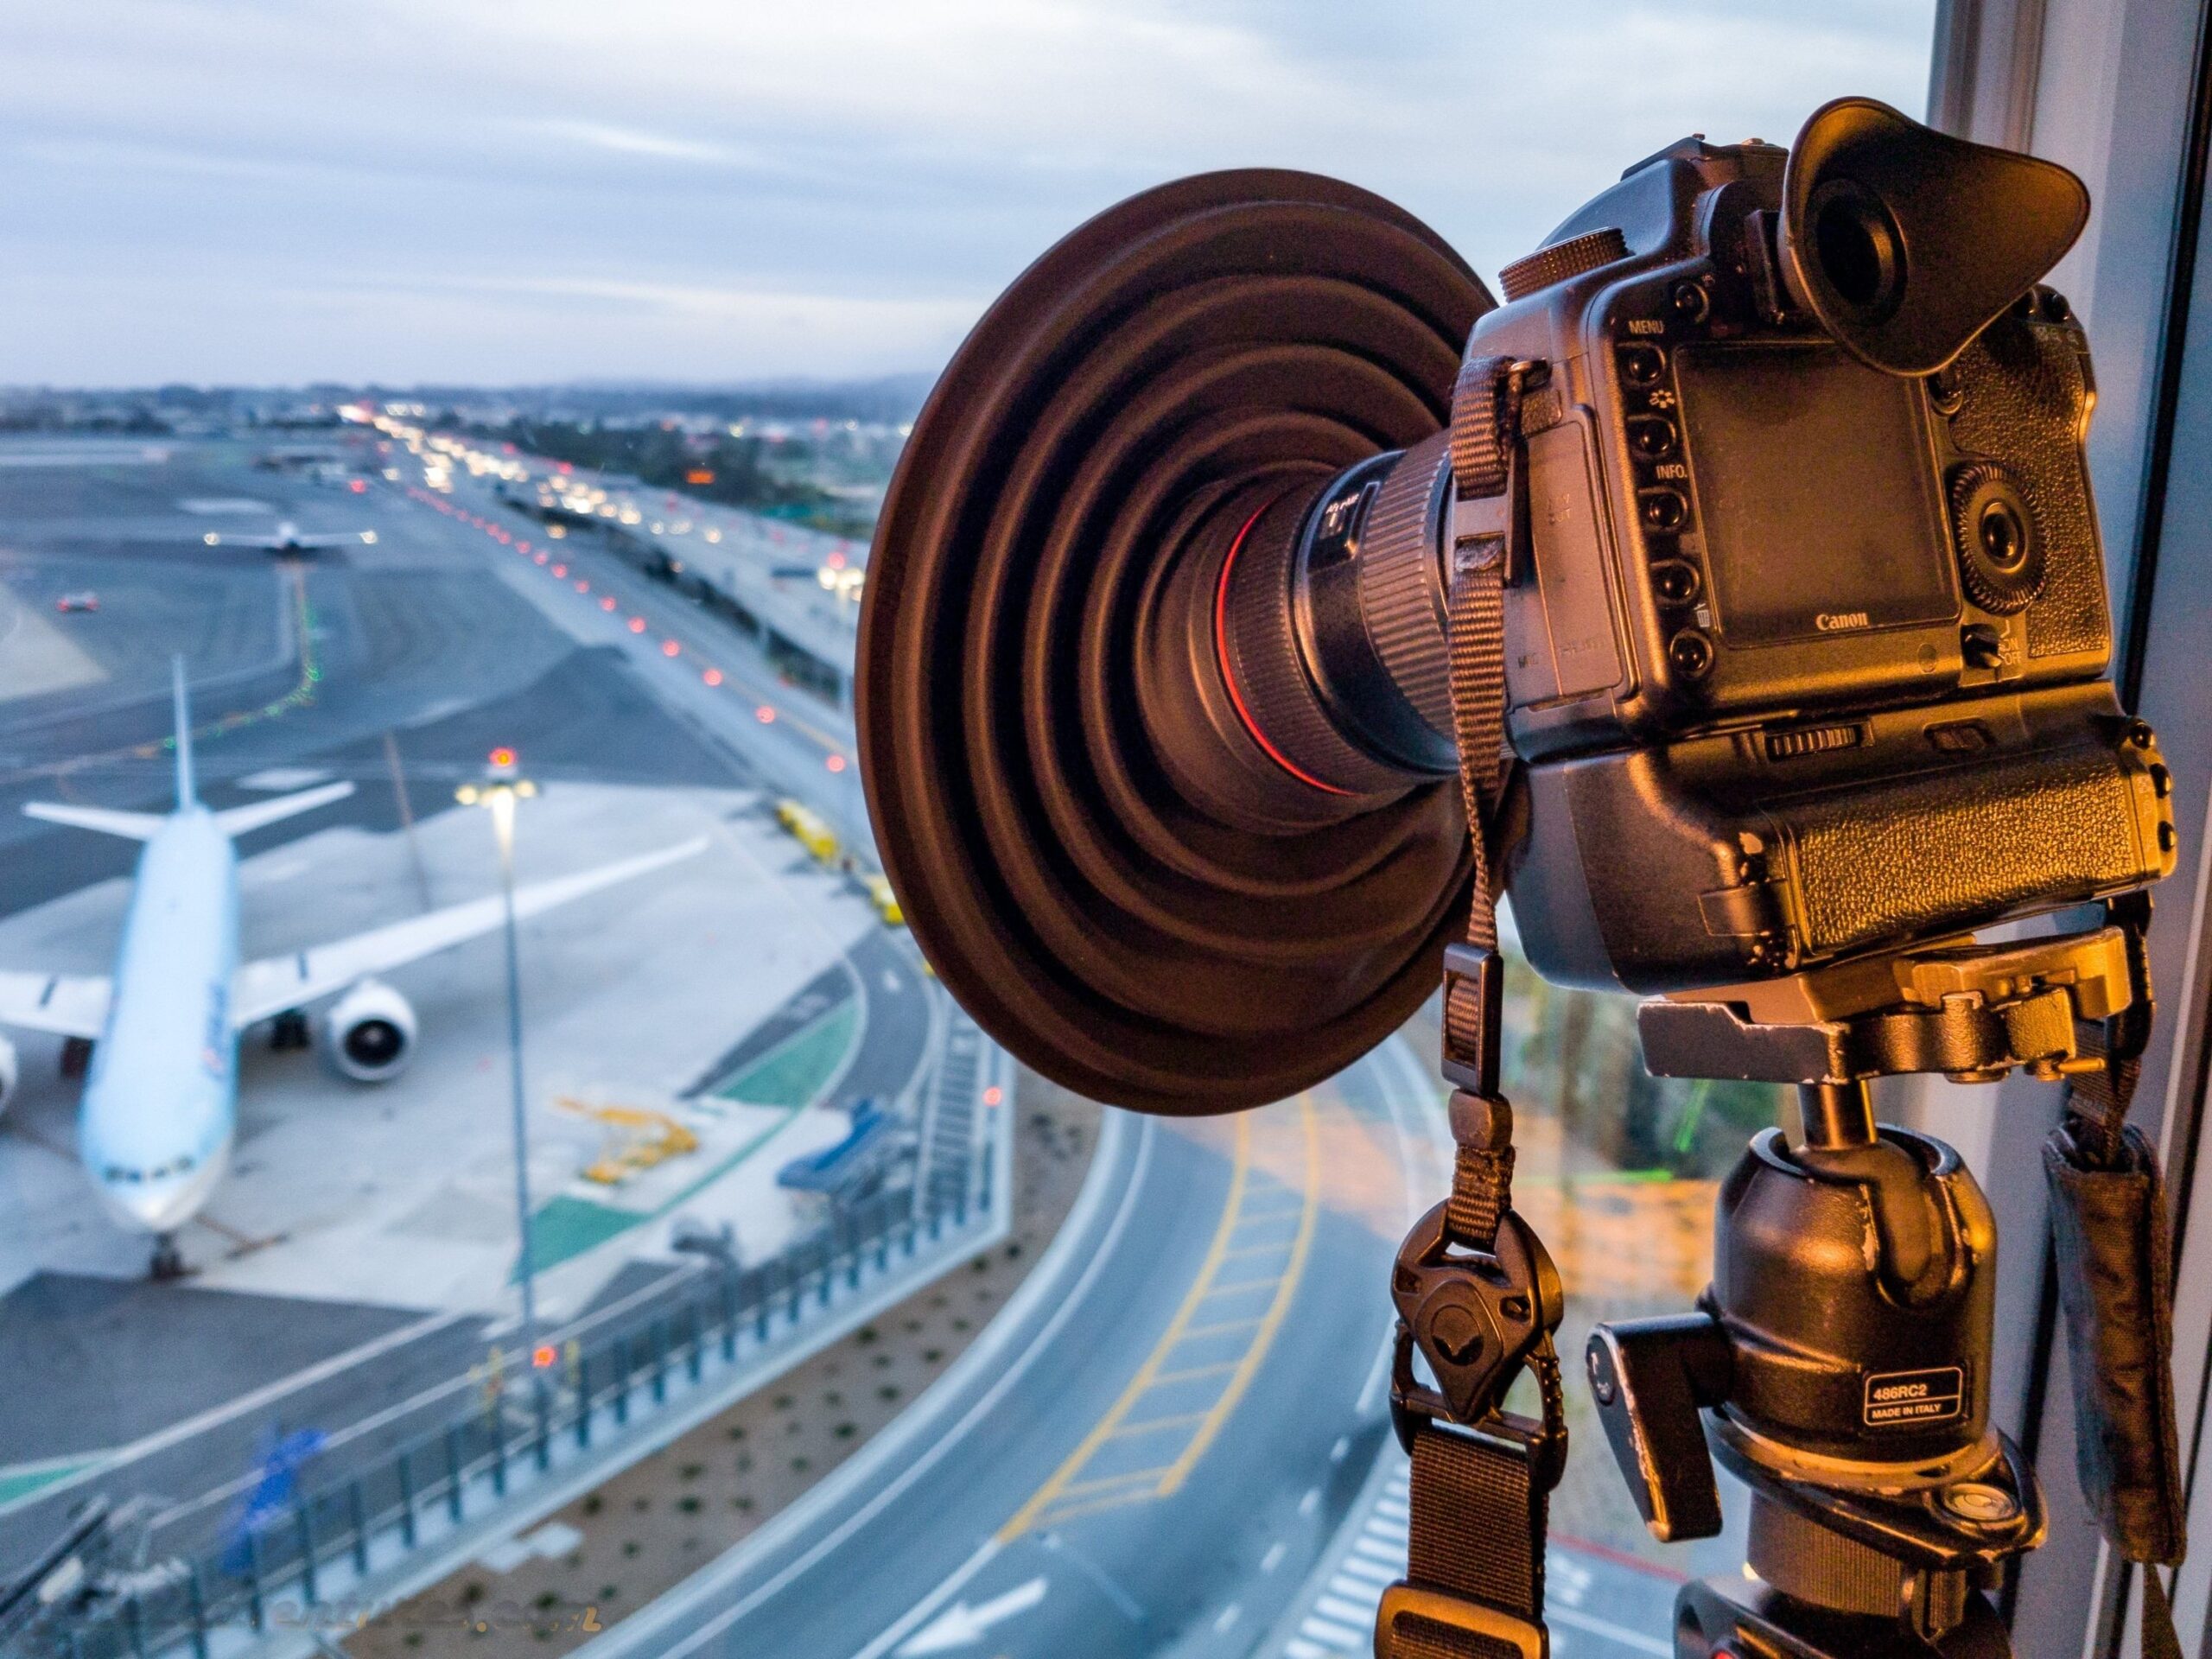
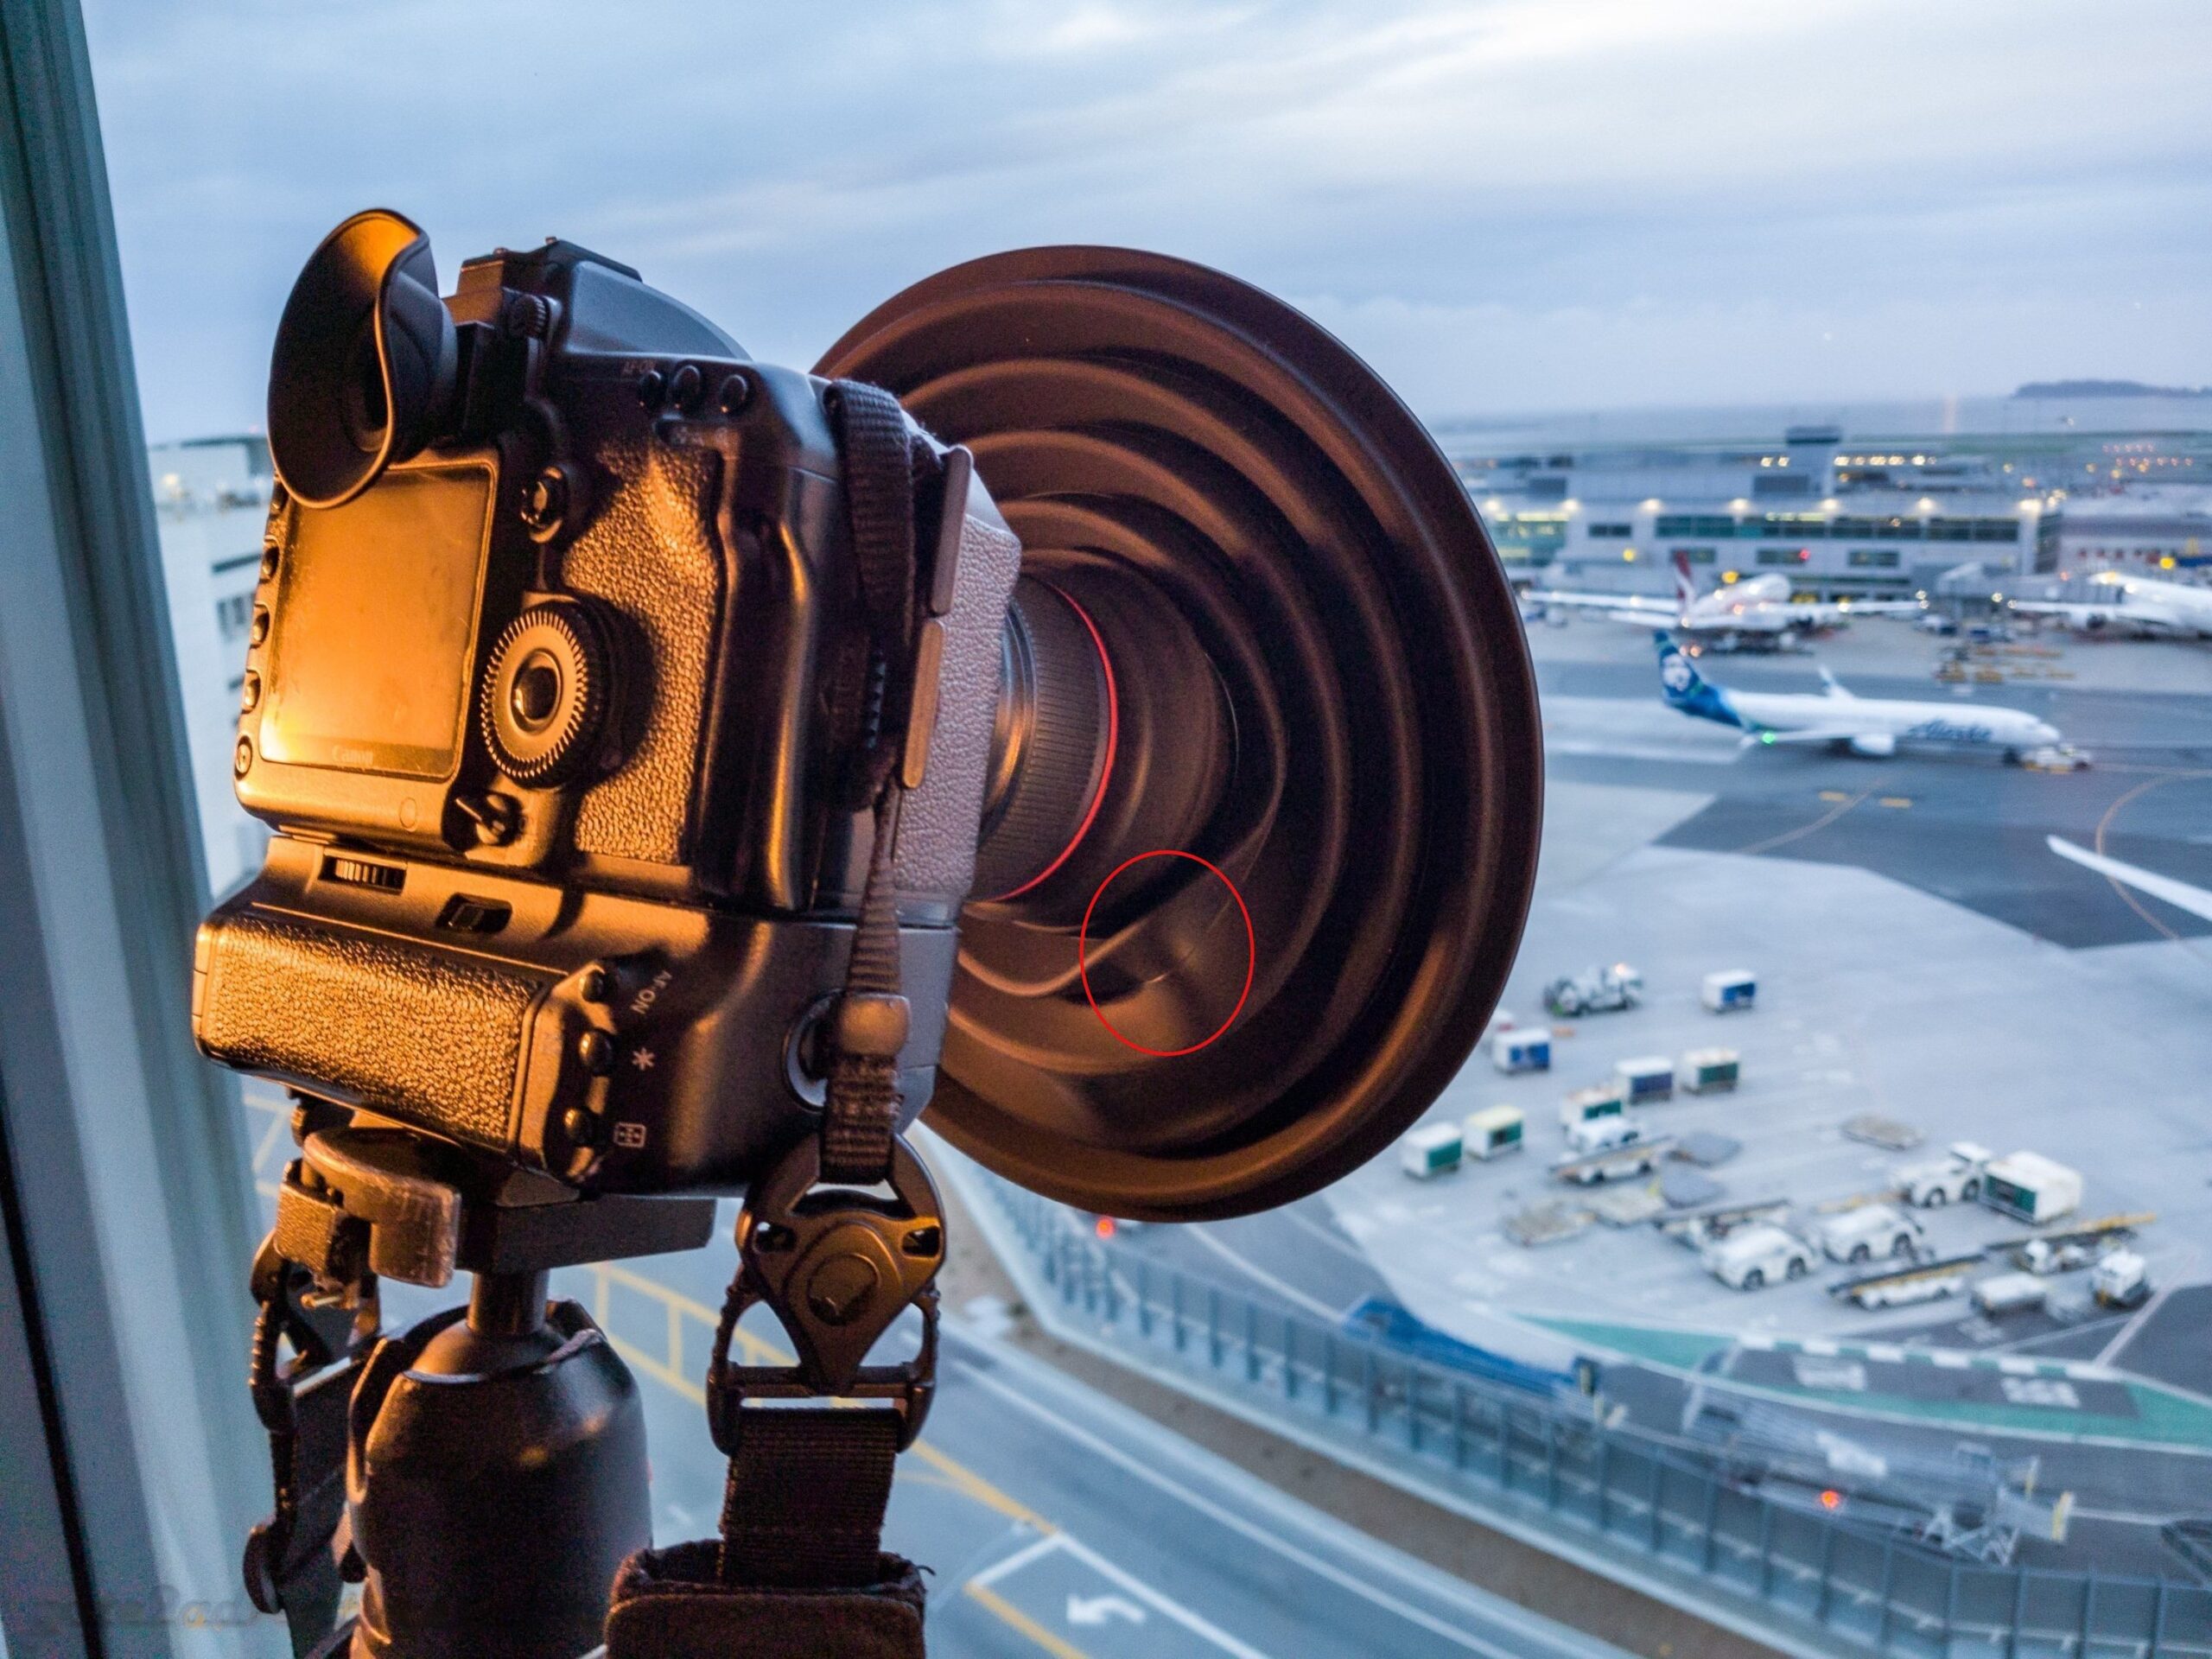
I am very happy with the product, and it gives me exactly what I need. My decision to buy this product was made at the Manchester Grand Hyatt in San Diego. They have a bar on the top floor with awesome views of the city and bay, but just to much glare. I finally decided to get this little gimmick but had to leave San Diego before it would arrive. My first actual use was while plane spotting on the Sky Terrace at San Francisco International Airport.
Is it worth spending a few dollars on a piece of silicone? Absolutely!!! I am so happy with it and got into talks with many other people while using it. Everyone is so interested in that piece, even non-photographers.

Be aware, this is not a 100% guaranteed solution to take glare and reflection-free photos when shooting through glass. For example, it doesn’t work 100% at the Grand Hyatt at SFO. They have two sets of windows spaced about 2 inches apart. While you block out the glare from the first window, you can’t reach the second window. You might see some reflections depending on your position and time of the day. They used this method for the soundproofing of the windows. It’s no issue if you have multiple layers of glass right on top of each other like at regular windows or glass panels at observation decks.
Peter is an award-winning photographer who travels all over the world to capture the beauty of our planet as well as the achievements of humanity. Follow Peter on his travel blog Gate to Adventures for more amazing places to go and explore.


